
U.T.E.P! - UnrealTournament Enhancement Project!
U.T.E.P! - UnrealTournament Enhancement Project!
Many of you are familiar with my old mod "EnhancedUT" I released several years ago. This is an updated and revised version of that mod. All of the coding is done (we'll say about 95% anyways) and I have fixed all of the bugs that I can tell so far anyways, but I won't know 'til i get it released and find some beta testers  Anyways, the whole point of this post was to get some information on doing textures.. I have a friend of mine that is supposed to enhance all of the original weapon / ammo pick-up's but he has a busy life and has yet to finish the package and send it to me. So I am wanting to know if someone would be able to help teach me how to take all of the original textures and update them via photohop. I know how to export the textures and what not, I'm not a total newb.
  So yeah, I really want to take all of the original textures and update them to 2015 standards. (the best i can anyways, haha) And if anyone would be willing to help me figure this out I would be eternally grateful! Ha ha ha!

Re: U.T.E.P! - UnrealTournament Enhancement Project!
hmmmm I have very limited time.. I'll think about that.. maybe...
Hope someone else jumps in and help you..
Hope someone else jumps in and help you..
-
SC]-[WARTZ_{HoF}
- Adept
- Posts: 426
- Joined: Tue Feb 21, 2012 7:29 pm
Re: U.T.E.P! - UnrealTournament Enhancement Project!
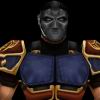
Here is how to make a pickup texture go from this:

to this:

using wotgreal exporter and photoshop Krid.
First of all you'll have to export the the weapon skins and
I prefer using wotgreal because it allows to exporting to *.bmp which is
my editing preference. Since you have experience with wotgreal
I'm gonna skip the how to's on exporting those skins.
Now UT99 weapons skins have a pickup texture that is a
combination of four hand held skins which usually match.
At this point I'll start up Photoshop and open the hand held skins of
the weapon I'm working on and change them from Index to RBG mode(Image/Mode/RBG Color).
Then I enlarge the textures to 1024*1024(Image/Image Size)
and then apply 2 sharpens(Filter/Sharpen/Sharpen = twice).
At this point I adjust the textures lighting because UT99 textures
seem a bit washed out.
I then adjust the Input Levels of the textures(Image/Adjustments/Levels)
to anywhere between 0.7 to 0.5.
Then adjust the Exposure(Image/Adjustments/Exposure).
Modifying the Exposure anywhere between +1.5 to +4 and
Gamma anywhere between 0.5 to 0.7.
Then I adjust the Brightness and Contrast(Image/Adjustments/Brightness/Contrast).
Modify the Brightness anywhere between -30 to -100 and Contrast anywhere between +30 to +60.
NOTE: That you should probably apply the same Image adjustments to all four textures per weapon
but not all four textures will always have the same levels. If that is the case instead
of adjusting all four textures separately you could just combine them all before applying
those adjustments but you'll need to separate them again after you have reduced
the combined texture to 512*512 for the pickup texture.
After that then reduce all four hand held textures to 512*512. Change them from RBG to
Indexed Color(Image/Mode/Indexed Color) and save as *.bmp. At this point do not close
them in the editor because you need to still combine them for the pickup texture.
You need to now take all four textures and combine them making a 1024*1024 image.
So hit the Step Backward on the last change you made to each texture which was
Indexed Color(Edit/Step Backward). Combine them in the order of the default pickup texture
and now reduce the size to 512*512 and Indexed Color/save as .*bmp.
You should have 5 new textures for your UT99 weapon. I'm really not good at tutorials so if
I missed anything feel free to fill in the blanks.
to this:
using wotgreal exporter and photoshop Krid.
First of all you'll have to export the the weapon skins and
I prefer using wotgreal because it allows to exporting to *.bmp which is
my editing preference. Since you have experience with wotgreal
I'm gonna skip the how to's on exporting those skins.
Now UT99 weapons skins have a pickup texture that is a
combination of four hand held skins which usually match.
At this point I'll start up Photoshop and open the hand held skins of
the weapon I'm working on and change them from Index to RBG mode(Image/Mode/RBG Color).
Then I enlarge the textures to 1024*1024(Image/Image Size)
and then apply 2 sharpens(Filter/Sharpen/Sharpen = twice).
At this point I adjust the textures lighting because UT99 textures
seem a bit washed out.
I then adjust the Input Levels of the textures(Image/Adjustments/Levels)
to anywhere between 0.7 to 0.5.
Then adjust the Exposure(Image/Adjustments/Exposure).
Modifying the Exposure anywhere between +1.5 to +4 and
Gamma anywhere between 0.5 to 0.7.
Then I adjust the Brightness and Contrast(Image/Adjustments/Brightness/Contrast).
Modify the Brightness anywhere between -30 to -100 and Contrast anywhere between +30 to +60.
NOTE: That you should probably apply the same Image adjustments to all four textures per weapon
but not all four textures will always have the same levels. If that is the case instead
of adjusting all four textures separately you could just combine them all before applying
those adjustments but you'll need to separate them again after you have reduced
the combined texture to 512*512 for the pickup texture.
After that then reduce all four hand held textures to 512*512. Change them from RBG to
Indexed Color(Image/Mode/Indexed Color) and save as *.bmp. At this point do not close
them in the editor because you need to still combine them for the pickup texture.
You need to now take all four textures and combine them making a 1024*1024 image.
So hit the Step Backward on the last change you made to each texture which was
Indexed Color(Edit/Step Backward). Combine them in the order of the default pickup texture
and now reduce the size to 512*512 and Indexed Color/save as .*bmp.
You should have 5 new textures for your UT99 weapon. I'm really not good at tutorials so if
I missed anything feel free to fill in the blanks.


-
EvilGrins

- Godlike
- Posts: 9784
- Joined: Thu Jun 30, 2011 8:12 pm
- Personal rank: God of Fudge
- Location: Palo Alto, CA
- Contact:
Re: U.T.E.P! - UnrealTournament Enhancement Project!
Made sense to me, what you described there is almost the same thing (different graphics program notwithstanding) I described when talking about taking monster skins from ut2004 to use in ut99 · viewtopic.php?p=40438#p40438SC]-[LONG_{HoF} wrote:I'm really not good at tutorials so if
I missed anything feel free to fill in the blanks.
http://unreal-games.livejournal.com/

Smilies · viewtopic.php?f=8&t=13758medor wrote:Replace Skaarj with EvilGrins
-
Chamberly

- Godlike
- Posts: 1963
- Joined: Sat Sep 17, 2011 4:32 pm
- Personal rank: Dame. Vandora
- Location: TN, USA
- Contact:
Re: U.T.E.P! - UnrealTournament Enhancement Project!
Awesome. Another reason to use my photoshop program then. 


Re: U.T.E.P! - UnrealTournament Enhancement Project!
SC]-[LONG_{HoF}, great description you made up here, so don't worry about your tutorial skils :p
That tut above is correct for GIMP users too.. except that the same functions exist in gimp but in different menus/tabs
That tut above is correct for GIMP users too.. except that the same functions exist in gimp but in different menus/tabs
-
Spectra
- Masterful
- Posts: 542
- Joined: Tue Jan 22, 2013 5:23 pm
- Personal rank: Nullified!
- Location: (X) Unable To Locate....
Re: U.T.E.P! - UnrealTournament Enhancement Project!
I guess Gimp doesn't have Exposure Option rather it has something called Curve or idk....
Here the result I got when using gimp:
1. 256x256:
2. 512x512:
Btw what should be the level of Sharpen?? Gimp gives options from 0-100.
Here the result I got when using gimp:
1. 256x256:
- HDJRazor5.jpeg (44.76 KiB) Viewed 2436 times
-
SC]-[WARTZ_{HoF}
- Adept
- Posts: 426
- Joined: Tue Feb 21, 2012 7:29 pm
Re: U.T.E.P! - UnrealTournament Enhancement Project!
Looks like you'll need to experiment with gimp on the sharpening. From the looks of that pic seems it was sharpened a bit to much.
I have zero experience with Gimp so maybe when I find the time I'll DL Gimp and attempt tinkering to duplicating what I did in photoshop.
I have zero experience with Gimp so maybe when I find the time I'll DL Gimp and attempt tinkering to duplicating what I did in photoshop.